


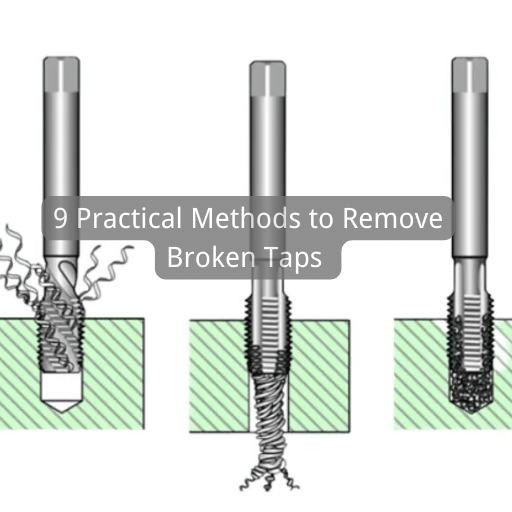
Removing broken taps from a workpiece is a common challenge for machinists. It requires the proper technique, tools, and patience. Mishandling a broken tap can cause irreparable damage, leading to time and cost inefficiencies. This guide explains 9 practical methods to effectively remove broken faucets, with detailed explanations and required tools. Gain a robust understanding of this critical aspect of machining and handle such situations confidently and proficiently.
Why Taps Break: Common Reasons for Tap Breakage
Taps can break for various reasons, often related to mechanical stress or incorrect usage.
- Inadequate Lubrication: The friction generated during the tapping process can lead to excessive heat, which can weaken and eventually break the tap.
- Poor Quality Material: Taps made from substandard materials may not withstand the demands of repeated use, leading to premature failure.
- Incorrect Tap Size: Using a tap that’s either too large or too small for the hole can put undue stress on the tool, increasing the likelihood of breakage.
- Improper Alignment: If the tap is not perfectly aligned with the hole, it can cause uneven force distribution, resulting in tap breakage.
- Excessive Feeding Force: Pushing the tap too hard into the material can also cause it to break.
Understanding these causes can help machinists take preventive measures, thus avoiding the time-consuming and potentially costly process of removing broken taps.
Prevention Tips for Tap Breakage

Avoiding tap breakage in the first place can save machinists significant time, effort, and expense. Here are some preventative measures to consider:
1. Correct Lubrication: Ensure proper lubrication during tapping to decrease friction and prevent overheating. The type of coolant or lubricant used should be compatible with the material being tapped.
2. Quality Control: Invest in high-quality taps made from durable materials. Good-quality tools will be more resilient to the stress of repeated use.
3. Size Accuracy: Select the correct tap size for the hole. Ensure the tap aligns perfectly with the hole to prevent uneven force distribution.
4. Proper Alignment: Maintain proper tap alignment with the hole. Using a tapping guide or a tapping machine can help ensure accurate alignment.
5. Controlled Feeding Force: Avoid using excessive force when tapping. Even pressure throughout the process can significantly reduce the likelihood of tap breakage.
By carefully adhering to these prevention tips, machinists can significantly reduce the incidence of tap breakage, ensuring a smoother, more efficient machining process.
Essential Tools for Tap Removal
The right tools to remove broken taps can make the process easier and more efficient. These tools should be a part of any machinist’s toolbox:
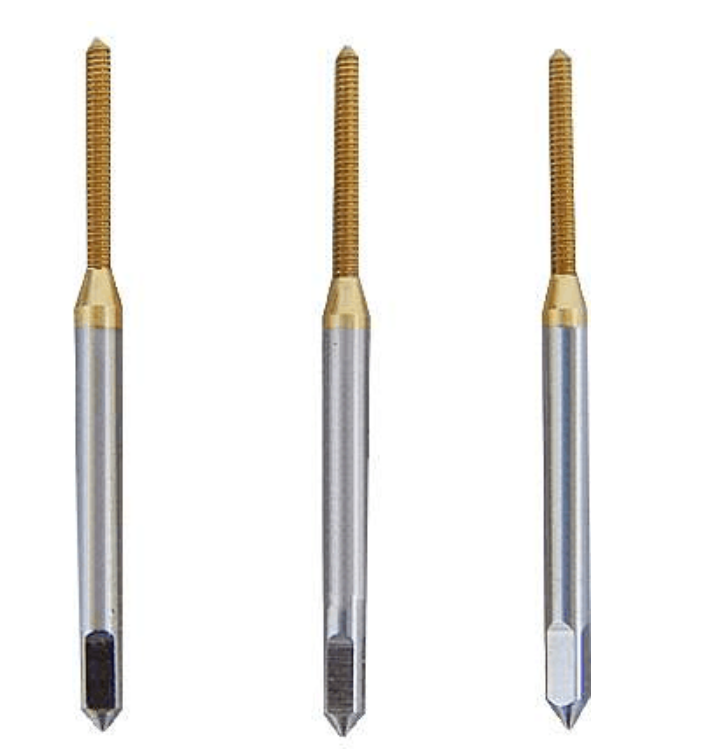
- Tap Extractors: These tools are designed specifically for extracting broken taps. They come in different sizes to match the tap size and number of flutes.
- Drill Bits: High-quality cobalt or carbide drill bits are needed to drill into the broken tap if extraction isn’t possible. The drill bit required will depend on the size of the fixture.
- Center Punch: Used to make a guide hole for the drill bit, ensuring you drill in the exact center of the broken tap.
- Hammer: A light hammer may be required to tap the center punch and make the guide hole gently.
- Pliers: Once you’ve drilled a hole into the tap, you may be able to use pliers to twist and remove the faucet.
- Safety Equipment: Always prioritize safety first. Safety glasses to protect your eyes from shards of metal and gloves to protect your hands are necessary.
By ensuring you have these essential tools at your disposal, you can approach the task of tap removal with confidence and precision.
Method 1: Using a Tap Extractor

A tap extractor is specially designed to remove broken taps. Here’s a step-by-step guide on how to use one:
Step 1: Select the Correct Tap Extractor
The first step involves choosing the correct-sized tap extractor. Ensure the tool matches the number of flutes and the size of the broken tap.
Step 2: Insert the Tap Extractor
Carefully insert the tap extractor into the broken tap. Ensure the extractor’s fingers or prongs slide into the flutes of the fixture.
Step 3: Adjust the Tap Extractor
Next, adjust the tap extractor so the fingers deeply engage with the flutes. This secure engagement ensures the force applied is distributed evenly across the tap.
Step 4: Turn the Tap Extractor
Using an appropriate wrench, gently turn the tap extractor counterclockwise. This rotation should loosen the broken tap.
Step 5: Extraction
As the broken tap loosens, continue turning the extractor until the faucet is entirely removed.
Remember, the key to successful extraction is patience and gentle force. Forcing the tool may risk causing more damage to the workpiece or the device itself. Always work with care and attentiveness.
Method 2: Drilling Out the Tap

In some cases, when the tap cannot be extracted by using a tap extractor, it might be necessary to drill out the broken faucet. Here’s a step-by-step guide on how to do it:
Step 1: Select the Appropriate Drill Bit
Choose a cobalt or carbide drill bit that matches the core diameter of the broken tap. The drill bit should be smaller than the tap’s thread diameter to avoid damaging the thread.
Step 2: Secure the Workpiece
Ensure the workpiece is securely fastened and doesn’t move during drilling. Ensure it is correctly aligned with the drill press.
Step 3: Mark the Center of the Tap
Use a center punch to mark the exact center of the broken tap. The punched mark will guide the drill bit and help ensure you drill straight into the fixture.
Step 4: Start Drilling
Start drilling into the broken tap with the workpiece secured and the center marked. Begin at a slow speed and gradually increase as you get deeper into the fixture. Remember to lubricate the drill bit to reduce heat and friction.
Step 5: Extract the Remaining Tap
After drilling, the broken tap’s structure should be weak, and you can use a small pointed tool or a pair of pliers to extract the remaining parts of the fixture.
Remember, drilling out a tap should be considered a last resort. It’s a time-consuming method with a risk of damaging the workpiece. Proceed with caution and patience, and always prioritize safety.
Method 3: Using a Chisel
In specific scenarios, if the tap hasn’t broken too far into the hole, a chisel can be used to remove it. Here’s the step-by-step process:
Step 1: Choose the Right Chisel
Select a sharp, good-quality chisel smaller than the tap’s diameter. The chisel should be strong enough to cut into the tap’s metal.
Step 2: Position the Chisel
Place the chisel at an angle on the broken tap’s edge. It should be positioned in a way that corresponds with the tap’s counterclockwise thread direction.
Step 3: Apply Force
Tap lightly on the chisel with a hammer, applying force in a counterclockwise direction. The goal is to loosen the broken tap without damaging the threads in the hole.
Step 4: Remove the Tap
Once the tap has loosened, use pliers or a magnet to remove it from the hole.
Using a chisel requires a lot of patience and precision to avoid causing more damage. It’s essential to work slowly and use light, controlled strikes.
Method 4: EDM (Electric Discharge Machining)
EDM, or Electric Discharge Machining, is a more sophisticated and precise method of removing broken taps. This process uses electrical discharges or sparks to remove the broken faucet. Here’s a step-by-step guide:
Step 1: Secure the Workpiece
Ensure that the workpiece with the broken tap is securely fastened and correctly aligned with the EDM machine.
Step 2: Set the EDM Machine
Set the EDM machine with the correct parameters. These parameters may include power, pulse frequency, and polarity, depending on the broken tap’s specifics and the workpiece’s material.
Step 3: Position the Electrode
The electrode, which will create the spark, should be positioned over the broken tap. Ensure the electrode is of appropriate size and shape.
Step 4: Initiate the EDM Process
Start the EDM process. The machine will use a series of rapid, controlled sparks to erode the broken tap. This process does not cause any damage to the surrounding material.
Step 5: Clean and Inspect the Workpiece
Once the tap has been eroded, clean the workpiece thoroughly and inspect the hole to ensure all tap fragments have been removed.
EDM is a highly effective method but requires specialized equipment and knowledge. It is most suitable for industrial settings or complex tap removal tasks. Remember, safety should always be prioritized no matter which way you choose. Wear adequate safety gear and work with total concentration to prevent any mishaps.
Method 5: CNC Machining
CNC (Computer Numerical Control) machining can also remove a broken tap. This automated and highly precise method makes it ideal for complex parts and materials. Here’s the step-by-step process:
Step 1: Program the CNC Machine
Programming the CNC machine is a critical step. You’ll need to input the specifics of the broken tap and the workpiece, including dimensions and material type. Ensure the program correctly instructs the machine to align with the tap’s center.
Step 2: Secure the Workpiece
Ensure the workpiece is clamped securely in the CNC machine. It should not move during the machining process. The alignment should be perfect to avoid any further damage to the workpiece.
Step 3: Install the Correct Cutter
Select a cutter that is smaller in diameter than the broken tap. The blade should be made of a material more complex than the tap to ensure it can cut through it.
Step 4: Run the CNC Program
After programming and setting up, run the CNC program. The machine will cut around the tap without damaging the threads in the hole.
Step 5: Remove the Tap Remnants
Once the CNC machine has completed its program, remove the remnants of the broken tap. This can usually be done by hand or with pliers.
CNC machining is an advanced method that provides excellent results but requires specific knowledge and experience to operate the machine. Safety is crucial during this process, so always wear appropriate protective gear.
Method 6: Welding on a Nut
Sometimes, welding a nut onto the broken tap can provide enough grip to remove it. Here’s how you can do it:
Step 1: Select the Appropriate Nut
Choose a steel nut that is large enough to fit over the broken tap. The nut’s inner diameter should be slightly larger than the tap’s outer diameter.
Step 2: Position the Nut
Place the nut over the broken tap, aligning it so that the fixture is in the center of the nut’s opening.
Step 3: Weld the Nut and Tap Together
Using a MIG or TIG welder, weld the inside of the nut to the broken tap. The weld should be strong enough to bind the nut and tap together. Remember to wear appropriate safety gear during the welding process.
Step 4: Let the Weld Cool
Allow the weld to cool for a reasonable time. The cooling process will cause the metal to contract, which may help to loosen the broken tap.
Step 5: Turn the Nut
Once the weld has cooled, use a wrench to gently turn the nut counterclockwise. The welded connection should allow the broken tap to hang with the nut, facilitating removal.
Welding on a nut is a practical removal method but requires specific safety measures and proper welding equipment. It can provide a firm grip and enough leverage to remove the broken tap if done correctly. Always remember safety first when dealing with welding equipment.
Method 7: Using a Cold Chisel
A cold chisel can be a handy tool to remove a broken tap. This method involves slightly cutting into the fixture to create a groove, which can then be used to rotate the tap out. Here’s the step-by-step process:
Step 1: Select a Suitable Cold Chisel
Choose a cold chisel slightly smaller than the size of the broken tap. The chisel must be sharp enough to groove on the tap without damaging the threads in the hole.
Step 2: Position the Cold Chisel
Position the chisel at an angle on the broken tap’s edge to create a notch. This notch will be used to rotate the fixture out of the hole.
Step 3: Create a Notch
Lightly hammer the chisel into the tap to create a notch. Remember to strike counterclockwise, aligning with the tap’s thread direction.
Step 4: Rotate the Tap
Place the chisel in the notch created and gently tap it with a hammer, maintaining a counterclockwise direction. This should start to rotate the broken tap out of the hole.
Step 5: Remove the Tap
Once the tap has loosened, use a pair of pliers to remove it completely.
Using a cold chisel requires high precision to avoid damaging the threads in the hole. Always proceed with caution and patience.
Method 8: Utilizing Pliers
This method is simple but works best when the tap isn’t broken too far down into the hole. Here’s the process:
Step 1: Select the Right Pliers
Choose a pair of needle-nose pliers, which are ideal for this task due to their long, thin jaws that can easily fit into the hole. Ensure the pliers have an excellent grip to prevent slipping.
Step 2: Position the Pliers
Insert the pliers’ tips into the hole, trying to get a firm grip on the broken tap. Be careful not to apply too much pressure, as this could cause further damage to the threads.
Step 3: Turn the Pliers
Once you have a secure grip on the tap, slowly turn the pliers counterclockwise. Patience is key here; don’t rush or force the tap out.
Step 4: Extract the Tap
If the tap starts to loosen, continue turning the pliers until you can obliterate the tap. If it doesn’t, you may need to try another method or consult with a professional to avoid causing more damage.
Using pliers requires minimal tools and technical knowledge, making it a convenient method for most people. However, it’s important to handle the situation delicately to prevent any further damage to the workpiece.
Method 9: Seeking Professional Help
At times, despite your best efforts, a broken tap may prove to be too stubborn or the task too risky for a DIY approach. In these cases, it’s advantageous to seek professional help. Here’s why:
Step 1: Expertise and Experience
Professional tap removal services bring years of experience and a wealth of expertise to the table. They’ve likely seen and removed all types of broken taps under various circumstances, making them uniquely qualified to handle the task efficiently and effectively.
Step 2: Advanced Tools and Equipment
Professionals are equipped with advanced tools and machinery, such as high-precision EDM machines or CNC machines, which may not be accessible for most individuals. This equipment ensures accurate, safe, and quick tap removal.
Step 3: Minimized Risk of Damage
Due to their specialized knowledge and equipment, professionals can often remove the broken tap without causing any damage to the threads or surrounding material, preserving the integrity of your workpiece.
Step 4: Time and Effort Saving
Relying on professionals can save you a considerable amount of time and effort, especially if the broken tap is deeply embedded, or if the material of the workpiece is particularly hard.
Step 5: Cost-Effective in the Long Run
While hiring professionals might seem costly initially, it can be cost-effective in the long run. Damage to the workpiece or tool due to incorrect tap removal methods could result in far greater replacement or repair costs.
While DIY methods have their merit, do not hesitate to seek professional assistance when the situation is out of your comfort or skill zone. It’s essential to prioritize the quality and safety of your work over anything else.
In conclusion, removing a broken tap is a complex task that requires careful handling and the right techniques. It’s crucial to understand the nature of your task, including the material you’re working with and the severity of the tap break, to select the most suitable removal method. DIY methods, such as using a hammer and center punch, a tap extractor tool, a nut and welder, a cold chisel, or pliers, can be effective in certain scenarios. However, if the tap break is too severe or the workpiece too valuable to risk further damage, seeking professional help is a viable and often cost-effective solution. Remember, the goal is to preserve the integrity of your workpiece while ensuring safety during the process.
Frequently Asked Questions (FAQs)
Q: What is a broken tap?
A: A broken tap refers to a situation where a tap, which is a tool used for creating internal threads in a hole, gets broken or stuck inside the material it was being used on.
Q: Why is it important to remove a broken tap?
A: It is important to remove a broken tap because it can obstruct the thread in the hole, making it difficult to use or causing damage to the material.
Q: What are some ways to remove broken taps?
A: There are several effective ways to remove broken taps, including using a tap removal tool, nitric acid, drilling a hole and extracting the broken pieces, and using needle nose pliers.
Q: Should I try to remove a broken tap by myself?
A: It depends on your expertise and knowledge. If you have experience removing broken taps and the necessary tools, you can try to remove it by yourself. However, if you are unsure or inexperienced, it is recommended to seek professional help from a machine shop or CNC machining services.
Q: Can I use a broken tap removal tool to remove a broken tap?
A: Yes, a broken tap removal tool is designed specifically for removing broken taps. It provides a secure grip on the tap, allowing you to extract it from the hole.
Q: What is the process of using nitric acid to remove a broken tap?
A: The process involves creating a small hole near the broken tap, pouring a small amount of nitric acid into the hole, and allowing it to dissolve the tap. It is important to handle nitric acid with caution and follow proper safety guidelines.
Q: Can I drill a hole near the broken tap to remove it?
A: Yes, you can drill a hole near the broken tap and use a specialized tool to extract the broken pieces. This method requires precision drilling and careful extraction to avoid damaging the material.
Q: Is it recommended to use needle nose pliers to remove a broken tap?
A: Needle nose pliers can be used to remove a broken tap if the tap is accessible and there is enough space to grip it with the pliers. However, this method may not be suitable for all situations and may require a higher level of skill.
Q: Are there any precautions to take when removing a broken tap?
A: it’s when removing a broken tap, it’s important to wear appropriate safety gear such as gloves and eye protection. Additionally, take precautions to avoid damaging the surrounding material and use cutting fluid or tap magic to lubricate the process.
Q: Can a broken tap be easier to remove if it is made of a specific material?
A: The material of the broken tap can affect the ease of removal. For example, steel taps are generally harder to remove compared to aluminum taps. However, the difficulty may also depend on other factors such as the size and location of the tap.
Q: Should I try using torque to remove a broken tap?
A: Using torque to remove a broken tap is not recommended as it can further damage the tap or the stuck material. Using specialized tools and techniques specifically designed for broken tap removal is best.


